
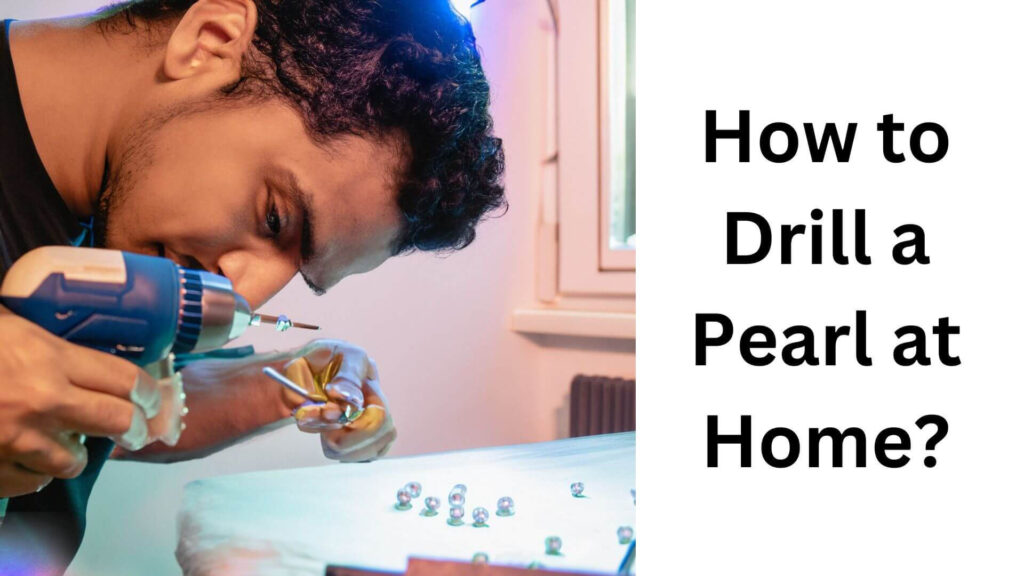
Are you ready to take your jewellery-making skills to the next level? If so, you might be interested in learning how to drill a pearl at home.
While it might seem intimidating initially, drilling a pearl is a simple process that can be easily mastered with the right tools and techniques.
To drill a pearl at home, you will need a few tools, such as a dremel, a diamond burr, safety goggles, and a clamp. Drilling a pearl at home is a simple process that can save you a lot of time and money.
If you have a pearl that you want to use for jewellery, the first step is to determine where you want to drill the hole. Once you have marked the spot, use the clamp to secure the pearl.
Next, use the diamond burr to create the hole slowly and carefully. Remember to wear your safety goggles to protect your eyes from flying debris.
Once the hole is complete, you can use the pearl however you want. For example, you can quickly drill a pearl at home with a few essential tools and some patience.
In this article, I’ll walk you through the step-by-step process of how to drill a pearl, from selecting the right pearl and drill bit to polishing the finished product.
Table of Contents
Understanding The Basics Of Drilling A Pearl
What Is Pearl Drilling?
Pearl drilling is a technique of drilling a hole through the center of a pearl. It is usually done to create a spot that can be used to attach the pearl to a piece of jewelry, like a necklace or bracelet.
Pearl drilling is a delicate and intricate process that requires precision and excellent skills. Understanding the basics of pearl drilling before attempting to drill a pearl at home is essential.
Different Types Of Drills Used For Pearl Drilling
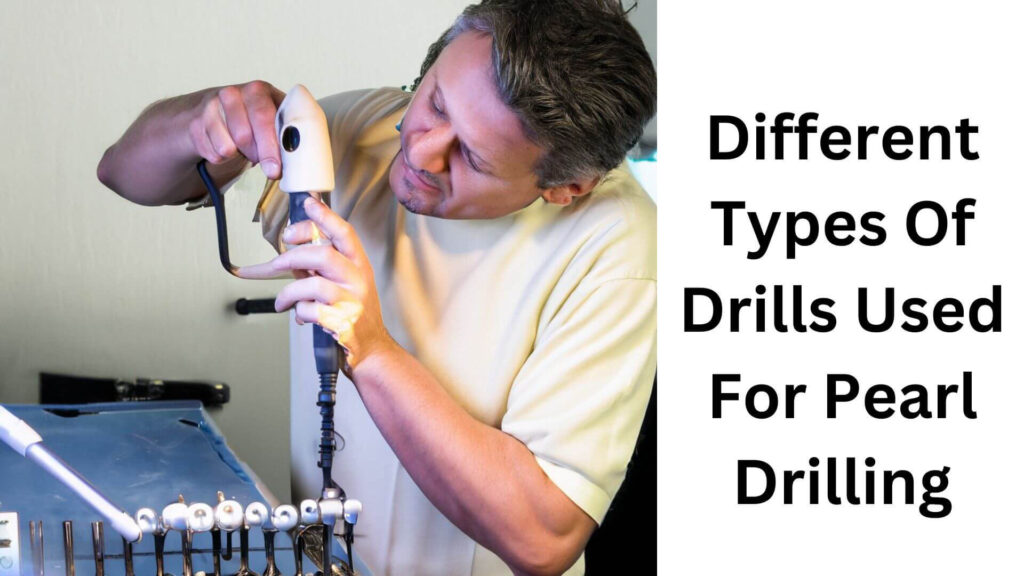
Drilling a pearl requires specialized tools, and several drills are commonly used. Some of the drills that are used for drilling pearls include:
- Handheld drills are small, handheld devices that drill small holes in pearls. They are easy to use and suitable for people new to pearl drilling.
- Drill press: A drill press is a machine that can drill holes in pearls. It is more powerful than a handheld drill and suitable for people with experience in pearl drilling.
- Micro drill: Micro training is specialized for drilling small holes in pearls. Professional jewelers commonly use it.
Check Also: Top Drill Machines for Home Use: Discover the Perfect Tool for Your DIY Projects.
Factors To Consider Before Drilling A Pearl
Before drilling a pearl, there are essential factors that one should consider. These factors include:
- Pearl type: Some pearls are more fragile than others and require more delicate handling. It is essential to understand the type of pearl that you have before attempting to drill it.
- Drill bit size: The size of the drill bit that you use will determine the size of the hole you create in the pearl. Choosing the right drill bit size is essential to ensure that you get the desired hole size.
- Drill speed: The speed at which you drill the pearl is essential. If you drill too quickly, you risk damaging the pearl.
- Lubrication: Lubricating the bit and the pearl will help reduce the risk of damage during the drilling process.
Essential Techniques For Successful Pearl Drilling
You can use several techniques to ensure that your pearl drilling process is successful. These techniques include:
- Marking: Marking the spot where you want to drill the pearl is crucial. It will help you drill the hole in the right place.
- Cooling: Cooling the pearl and drill bit during drilling is crucial. It will help reduce the risk of damage to the pearl.
- Gentle pressure: Using gentle pressure when drilling the pearl will help reduce the risk of damaging the pearl.
- Patience: Patience is crucial when drilling a pearl. It is essential to take your time and work slowly to ensure you do not damage the pearl.
Understanding the basics of pearl drilling is crucial before attempting to drill a pearl at home. Therefore, it is essential to consider the factors affecting the pearl drilling process and use the correct techniques to ensure a successful outcome.
With practice and patience, pearl drilling can be an enjoyable and worthwhile hobby.
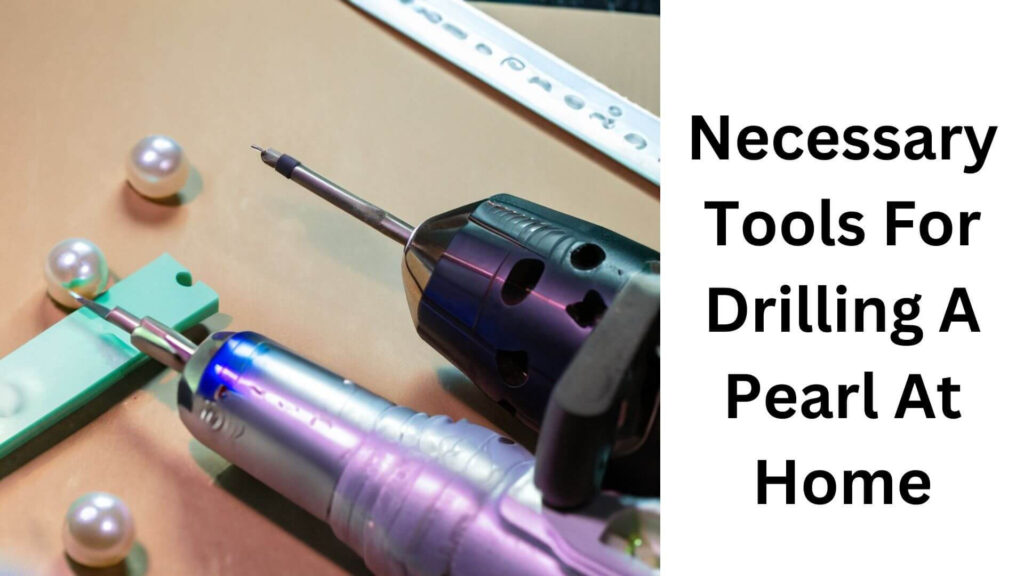
Necessary Tools For Drilling A Pearl At Home
Drilling a pearl can be challenging, especially if you do it for the first time. However, using the right tools and techniques, you can turn it into an easy and enjoyable experience.
Here I’ll look at the essential tools, materials, and techniques to drill a pearl at home.
1. Essential Tools For Drilling A Pearl
Before you start drilling, there are several tools that you need to have on hand. Here are some of the essential tools for drilling a pearl:
- Pearl drill bit: You’ll require a specialised pearl drill bit specifically designed to cut through the hard surface of the pearl without causing any damage. You can choose from several pearl drill bit sizes, depending on the size of your pearl and the hole you want to drill.
- Drill press or hand drill: A drill press or hand drill works well for drilling pearls, depending on your expertise and preference. However, a drill press is more precise and efficient and will provide better results.
- Clamp or vice: You need to secure the pearl in a fixed position to ensure that it doesn’t move while you’re drilling. A clamp or vice is an excellent tool for holding the pearl in place.
- Water: You’ll need water to keep the pearl cool while drilling. It will also help to lubricate the bit and prevent it from overheating.
Materials Required For Drilling A Pearl
Apart from the essential tools, you’ll also need some materials to drill a pearl. Here are some of the materials required:
- Pearls: Obviously, pearls are the stars of this project. You need to select high-quality pearls that are round and evenly shaped.
- Masking tape: You may need to use masking tape to secure the pearl and prevent any damage or scratches on the surface.
- Ruler or caliper: You will need a ruler or caliper to measure the size of your pearl accurately and determine the exact location where you want to drill the hole.
- Magnifying glass: A magnifying glass will help you see the pearl better and visualize the hole you’ll be drilling.
Commonly Used Techniques To Secure A Pearl
Drilling a pearl can still be tricky, even after having all the essential tools and materials. Here are some of the commonly used techniques that you can use to secure a pearl safely:
- Apply masking tape: Cover the pearl with masking tape, exposing a small amount of the area where you want to drill a hole. This prevents the pearl from slipping when drilling and helps avoid scratches.
- Use a clamshell: A clamshell can be an alternative to securing your pearl. Place your pearl into the clamshell and then clamp it down so it holds it in place, allowing your hands to be accessible during the drilling process.
- Apply pressure: It is essential to apply just the right amount of pressure while drilling. Too much stress can damage the pearl, while too little pressure can cause the bit to slip, leading to uneven holes or cracks. Practice using a lesser force and gradually increase the power as you become more comfortable.
Drilling a pearl requires patience, practice, and the right tools and techniques. Once you have all the necessary components, creating your unique jewelry pieces can be an exciting experience.
Read More: Mastering Home Brick Wall Drilling: Essential Tips and Techniques for Successful DIY Projects.
Step-By-Step Guide To Drilling A Pearl
1. Preparation: Preparing The Pearl For Drilling
Before drilling the pearl, it is essential to prepare it correctly. Follow these steps to ensure a successful drilling process:
- Clean the pearl with a soft cloth to remove any dirt or debris that could damage the pearl’s surface.
- Assess the shape and size of the pearl. If the pearl is irregular, it may be challenging to drill and must be handled carefully.
- Secure the pearl using a clamp or a pearl holder to keep it in place during drilling.
- Ensure you use protective eyewear and a mask to protect your eyes and lungs from dust and debris generated during drilling.
2. Selecting The Right Drill Size And Depth
Choosing the correct drill size and depth is crucial for drilling a pearl. Here are some key considerations when drilling pearls:
- Identify the appropriate drill size based on the pearl’s size and type.
- The drill bit should be at least 1/3 the size of the pearl for a successful drilling process.
- Use a depth gauge to ensure that you drill to the correct depth. This will prevent drilling too far, damaging the pearl, or not drilling deep enough to accommodate a setting.
3. Using Different Techniques To Drill A Pearl
Drilling a pearl requires skill and precision. Here are three techniques to try:
- Rotary drilling: This technique involves drilling through the pearl using a rotating motion. Start drilling at a low speed, gradually increasing until the desired depth is reached.
- Diamond drilling: This technique uses a diamond-coated drill bit to drill through the pearl. Diamond is the hardest mineral and can guide through pearls without damaging them.
- Hand drilling: This technique involves using a hand-held drill and slowly applying pressure to the pearl to create a hole. This method is suitable for drilling tiny pearls and requires precision and patience.
4. Polishing And Finishing Techniques
Polishing and finishing the drilled pearls bring out their natural shine and luster. Here are two techniques to try:
- Tumbling: Tumbling is a method that involves placing the drilled pearl in a mixture of abrasive media, such as silicon carbide grit and water. The mixture is tumbled to remove scratches and ensure a smooth surface.
- Polishing involves using a polishing cloth or a buffing wheel to bring out the pearl’s shine. Start with a low abrasive compound and work up to a high abrasive compound until you achieve the desired finish.
Drilling a pearl requires skill, precision, and attention to detail. Follow these step-by-step guides to drill a pearl successfully, choose the right drill size and depth, use different drilling techniques, and polish and finish your pearl. Remember to take your time and practice patience and safety during the process.
Bonus Tips And Tricks For Drilling A Pearl
Tips 1: Understanding The Anatomy Of Pearl
Pearls are organic gems of calcium carbonate formed by mollusks, including oysters and mussels. Understanding the anatomy of pearls before drilling them is essential to avoid damaging them. Here are the three main parts of pearls you should know about.
- Nacre: The hard, shiny substance formed by mollusks to protect themselves from irritants. It gives the pearl its lustrous appearance.
- Surface: This is the outer layer of the pearl.
- Center: The nucleus of the pearl is made up of tissue from the mollusk.
Tips 2: Necessary Precautions To Take For Successful Pearl Drilling
Before drilling pearls, certain precautions must be taken to avoid damaging the delicate gem. Here are some essential precautions to keep in mind.
- Use the right tools: To drill pearls, you’ll need a tiny drill bit, a hand drill, and a clamp to hold the pearl in place. Ensure that you use high-quality tools to avoid damaging the pearl.
- Work slowly: Do not rush the process. Instead, drill slowly and use steady pressure to prevent the pearl from cracking or chipping.
- Use lubricant: Use water or oil while drilling to prevent the pearl from overheating and cracking.
- Keep the pearl cool: To avoid damaging it, place it in a container of cold water during drilling.
Tips 3: Techniques To Repair A Cracked Pearl
If your pearl cracks while drilling, don’t panic. Instead, you can repair it with the following techniques.
- Clear nail polish: Apply clear nail polish or sealant to stabilize the crack.
- Epoxy glue: Apply a small amount of epoxy glue over the crack to seal it. Allow the glue to dry completely.
- Pearl filler: Apply a pearl filler to fill the crack, then buff the pearl until the surface is smooth.
Tips 4: Cleaning And Maintenance Tips For Your Drilled Pearl
Once you’ve drilled your pearl, cleaning and maintaining it correctly is essential. Here are some important tips to keep your pearl looking its best.
- Wipe the pearl with a soft, damp cloth to remove any dirt or grime after every use.
- Avoid exposing your pearl to heat or direct sunlight, which can cause discoloration and damage.
- Store your pearl in a soft, padded box or pouch to prevent scratches and damage.
- Avoid wearing your pearls while swimming, showering, or engaging in any other activity that may expose them to chemicals, saltwater, or other corrosive substances.
Drilling pearls at home can be an exciting endeavor. With the proper techniques and precautions, you can successfully drill pearls, repair them if necessary, and keep them looking beautiful for years.
Read More: Step-by-Step Techniques and Essential Tips for Drilling Glass Bottles Safely and Creatively.
Frequently Asked Questions For How To Drill A Pearl At Home
How Do You Drill A Hole In A Pearl?
Drilling a pearl at home requires a pearl drill, water, safety goggles, and patience. Mark the spot, then carefully drill into the pearl gently and fluidly.
What’s The Best Drill Bit For Pearls?
A 1/16-inch diamond bit is the best drill bit for pearls. It is strong enough to create the hole without damaging the pearl’s surface or shape.
Can I Use A Regular Drill Bit For Pearls?
No, regular drill bits aren’t suitable for drilling pearls. They can damage or break the delicate surface of your pearl. So it’s best to use a specialized diamond bit.
How Do You Keep A Pearl In Place While Drilling?
To keep a pearl in place while drilling, use a clamp or a helping hand. If you don’t have these tools, you can create a small groove on the surface to keep the pearl steady.
What Do I Do If My Pearl Cracks While Drilling?
Suppose your pearl cracks while drilling; it can’t be repaired. Stop drilling immediately when you hear a cracking sound. Without stopping at that point, it will break into pieces.
Final Verdict
With patience and the right tools, anyone can drill pearls at home. Not only is this a cost-effective solution, but it also allows for personalized and unique jewelry pieces. Again, remember to follow the steps carefully and take necessary safety precautions.
Always use protective gear, such as gloves and safety glasses, and have a good work area. Choosing suitable drills and knowing how to handle them is critical to success.
Additionally, understanding the different types of pearls available and their hardness levels can help you choose the right drill bit.
Practice and experiment with different designs to create beautiful and one-of-a-kind pieces. Now it’s your turn to try your hand at drilling pearls and explore the possibilities!

Hey, I am Shihab Uddin, I’m a huge fan of DIY crafts. My workshop is where I spend most of my spare time, and I’m always working on some project. To that end, I’d like to share some of my knowledge and experience with you in power tools, woodworking, and other specialized materials fabrication.
I will guide you with genuine knowledge that can assist you with deciding whether a drill is appropriate according to your requirements or not. If you want to find the best drill and know which type of drill is most suited for your needs, then I can guide you with my expertise. My passion lies in helping others find the correct products they need at an affordable price.
