

Sea glass is a beautiful and unique addition to any coastal decor. It is created when glass is thrown into the ocean and broken into pieces by the waves. These pieces are then tumbled and polished by the sea, making these unique art pieces.
Many people like to drill a hole in the center of their sea glass to create a pendant or necklace. This article will show you how to drill a hole in sea glass.
Table of Contents
Ideas For Making Sea Glass
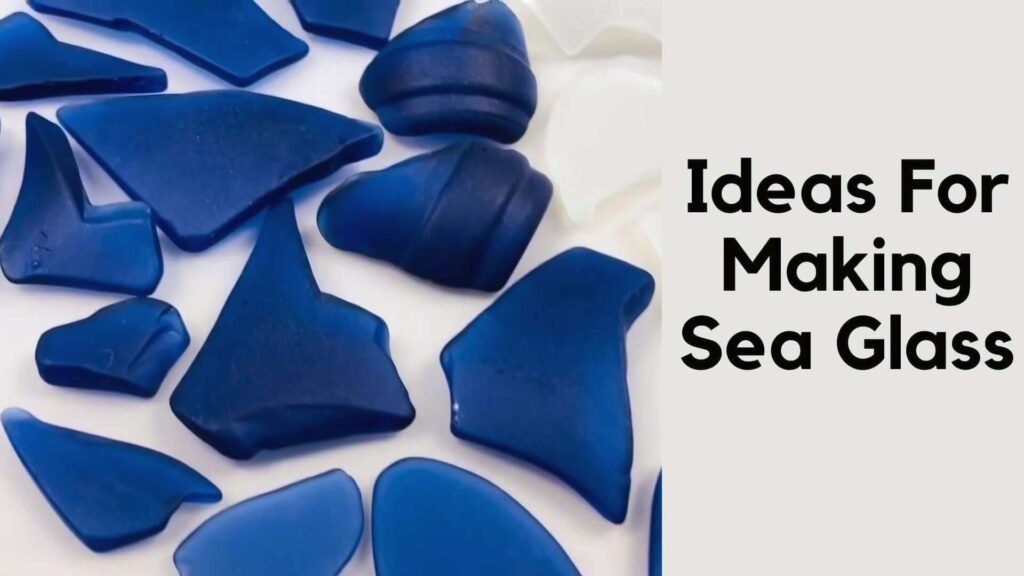
Sea glass is a DIY expert’s dream due to its unique frosted texture and multicolor scheme. There are thousands of beautiful sea glass projects and ideas; let me share a few of them with you below.
- You Can transform sea glass into artwork on a wall on canvas over paper or a piece of cloth.
- You can transform sea glass into your next gleaming dining table plate mat.
- Sea glass can be your next earring.
- A lovely midnight lantern.
- You can also use sea glass to create a hanging chandelier in your hallway.
- A candle holder for a tabletop.
- A water terrarium or a suncatcher.
Read More: How To Drill Aluminum
Step 1: Choose the Best Tools for the Job
Drilling into sea glass necessitates the use of fine-tuned tools. Your standard cordless drill will fall short of the task. As a result, you’ll need a Dremel to drill into sea glass because it’s more precise and has higher RPMs.
I recommend the Dremel Lite 7760 N/10, widely available on Amazon. The best thing about it is its low price and recharging capability, eliminating the need for wires. This will also be useful for your other household chores.
More OK drill bits are required when drilling sea glass. As a result, only diamond-coated drill bits are advised. Diamond drill bits are classified into two types:
The hollow center of Core Diamond Drill Bits allows for better heat dissipation and water flow. They are weaker and more vulnerable to damage due to their hollowness, but they have the advantage of acting faster. They come in various sizes, but I prefer 1mm, 2mm, and 3mm bits for drilling a hole in sea glass.
Diamond drill bits with solid ends are not hollow in the center. Compared to core bits, they are more durable and have a longer life.
They do, however, suffer from poor heat dissipation and high friction. Because of the poor heat dissipation, sea glass cracks and is thus unsuitable. SE Diamond Burr Set (20 PC.) – DT220R is recommended because of its low price and versatility in hole diameter.
Aiskaer 60 Pcs Premium Diamond Drill Bit is my personal favorite because it includes solid and core diamond bits ranging from 1mm to 3mm.
Read More: How to Drill Carbon Fiber
Step 2: Choose the Correct Bit Size
There are many different types of bits available for drilling holes in sea glass. The bit you choose will depend on the kind of glass you are working with and the size of the hole you need to make. Some bits are explicitly designed for drilling in sea glass, while others can plug into other materials.
The diameter of the intended hole dictates the size of the bit. For instance, you may require a minor diameter bit to drill holes for earrings. Similarly, a necklace requires a giant hole to accommodate a thicker thread to support the weight of multiple sea glasses.
Generally, sea glasses require 1mm, 2mm, or the final 3mm bits. Any thicker than that is typically detrimental to the sea glass.
If you want to embed a gemstone into the sea glass, use the HART BURS 90o Bearing Cutter to create a depression.
Once you have chosen your bit,
The bit you will use to drill into the sea glass is essential. There are a few different types of bits that you can use for drilling. The bit you choose will depend on the kind of glass you are working with. The bit you choose will also depend on the size of the hole you want to make.
Step 3: Apply the Bit Into the Glass
A bit is a sharp object inserted into the drill bit and used to drill into the sea glass. Using the right bit for the glass is essential, as it will affect how easily the hole is made.
When drilling a hole in sea glass, using the right bit for the drink is essential. The bit will affect how easily the hole is made. For softer glass, a minor bit will be more effective. For more complex glass, you will need a more significant bit.
Step 4: Properly Secure the Sea Glass
Following that, the sea glass should be securely attached to the cardboard using only an index finger.
If you are holding the sea glass in your hand, ensure that your writing is securely attached to the tabletop. Finally, keep the sea glass away from the drilling site.
Step 5: Drill into Sea Glass
All set, begin by drilling at a 45-degree angle on the glass to create an initial impression (this helps prevent drill slippage).
Once the cut is complete, rotate the cutter 90 degrees to create a final hole. To avoid heat build-up and cracks, all of this should be done slowly and with little to no pressure.
While drilling into sea glass, take frequent breaks to allow water to flow and remove debris. This contributes to the bit’s longevity.
All that is required is perseverance. Allow the bit to do the work for you by being more patient. This will assist in extending the bit’s life.
Step 6: Check Bit Cooling Properly
A poor colling strategy paves the way for cracks and significantly reduces the bit’s life. As a result, it is prudent to cool the bits properly.
You can accomplish this by using a water tub in the case of a flexible shaft, sponging the sea glass intermittently, or sprinkling water onto the top of the hole.
Step 7: Drill in a Circular Motion
Drill a circle around the hole you just made.
If you want to drill a hole in sea glass, you’ll need to make a circle around it. The easiest way to do this is to hold the sea glass in one hand and use the other hand to make a small hole in the center of it.
Then, use a drill bit that is the same size as the hole you just made and drill around the hole. You can use a chisel or a sharp knife to remove the excess sea glass when you’re finished.
Step 8: Be Patient and Take Your Time
Drilling a hole in sea glass can be a bit of a challenge, but you can get the job done with a bit of patience and some skill.
Make sure to use a drill bit that is the right size for the glass, and take your time to ensure that the hole is drilled straight and clean. Once the hole is prepared, it’s time to start working on the piece of glass.
Read More: How to Drill into Brick Without a Hammer Drill?
Best Tips for Drill A Hole In Sea Glass
I’ve attempted to summarize everything in the blog, but here are some Best tips on drilling a hole in sea glass.
1. Choose sea glass that is free of visible cracks. This is critical because the cracks will grow more prominent due to the drill’s vibration and will eventually destroy your entire project.
Avoid drilling on the sea glass’s edge.
2. If you wish to reshape sea glass, you should do so before drilling a hole.
3. Always begin with the tiniest drill bit possible.
4. Drill with pulsating pressure rather than constant pressure.
5. Drill from both ends for thick glasses.
Read More: How to Drill a Hole in a Mirror?
FAQs About How To Drill A Hole In Sea Glass
What is the value of sea glass?
Sea glass is a collector’s item, and its value varies according to individual, but on average, it sells for between $10 and $100 per piece. The value of sea glass is determined by its size, thickness, color, and texture.
What is a piece of pirate sea glass?
It is a type of sea glass that appears black but reveals its actual color when held up to the light. Typically, the color is olive green with a bubble embedded inside.
Is Seaglass a risk?
No! The amount of uranium used in the manufacture of sea glass is typically less than 1%, making it completely safe.
Final Thought
Sea glass is a beautiful and unique type of glass that you can find on beaches worldwide. It’s perfect for making jewelry, wind chimes, and other crafts.
By following these simple steps, you can quickly drill a hole in sea glass!

Hey, I am Shihab Uddin, I’m a huge fan of DIY crafts. My workshop is where I spend most of my spare time, and I’m always working on some project. To that end, I’d like to share some of my knowledge and experience with you in power tools, woodworking, and other specialized materials fabrication.
I will guide you with genuine knowledge that can assist you with deciding whether a drill is appropriate according to your requirements or not. If you want to find the best drill and know which type of drill is most suited for your needs, then I can guide you with my expertise. My passion lies in helping others find the correct products they need at an affordable price.
